iOS
This page details how to add the ReadyRemit SDK Package to your Project for iOS
Step 1 - Import the SDK
1.1 - Using Swift Package Manager
- Add the ReadyRemitSDK package to your Package.swift
.package(
    url: "https://github.com/BrightwellPayments/readyremit-sdk-ios",
    .branch("9.3")
)- Update your packages running the command
swift package update - Alternativelly you can import it directly via XCode,
- In Xcode's top menu, go to
File > Add Packages.... - In the dialog that appears, enter the URL of the repository in the search bar:
https://github.com/BrightwellPayments/readyremit-sdk-ios - Select Branch from the dependency rules
- Enter
9.3(or the desired version) as the branch name. - Click Add Package.
- Add the Package to Your Targets
1.2 - Using Cocoapods
- Open the Podfile in a text editor.
- Add the following line, replacing 9.3 with the desired version of the SDK:
pod 'ReadyRemitSDK', :git => 'https://github.com/BrightwellPayments/readyremit-sdk-ios.git', :branch => '9.3'
- Install the pod running
pod install
1.3 - Using binary
- Download the
ReadyRemitSDK.zipfrom here. - Unzip the file
- Create a
Frameworksfolder under your root project folder - Paste the unzipped
ReadyRemitSDK.xcframeworkinto the newly createdFrameworksfolder
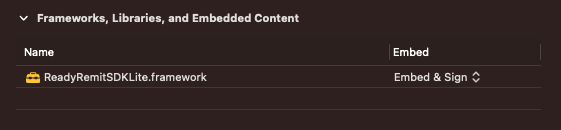
Add the SDK to your project
- Open your Project in XCode and go to the Project -> General -> Frameworks, Libraries, and Embedded Content.
- Drag and drop the downloaded SDK into the "Frameworks, Libraries, and Embedded Content" section of the settings.
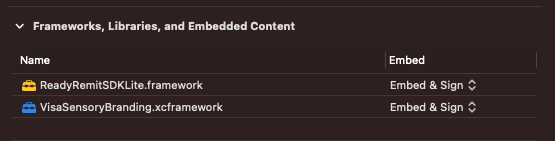
Install required libraries
- Download the
VisaSensoryBranding.zipfile from Github. - Extract the contents of the zip file and add the extracted library folder to the newly created "Frameworks" directory.
- In XCode select your main target in the "Project Navigator" window and switch to the "General" tab.
- Under "Frameworks, Libraries and Embedded Content" drag and drop the
VisaSensoryBranding.xcframeworkfolder
Step 2 - Implement ReadyRemit Delegate
Open the View Controller you will be launching the ReadyRemit SDK from, and add the ReadyRemitDelegate protocol to the ViewController class definition. (You will need to import the ReadyRemit SDK.)
You will want to conform it to the protocol by adding two functions.
The first function gets an Auth Token. This function will have two callbacks. One is to run if the call back is successful, and a second is a failure.
Security WarningThe Auth Token can be used to view users' personal information and bank information. Because of this, you should never store it in long-term storage
// ReadyRemitSDK
import ReadyRemitSDK

class ViewController: UIViewController, ReadyRemitDelegate {
    ...

    func onAuthTokenRequest(success: @escaping (String) -> Void,
                            failure: @escaping () -> Void) {
        // If token is available
        let authToken = "ACCESS_TOKEN_FROM_SERVER"
        DispatchQueue.main.async {
            success(authToken)
        }

        ...

        // If token is unavailable
        DispatchQueue.main.async {
            failure()
        }
    }
}
The second function is the onSubmitTransfer function. You should make an API call to your server with the TransferRequest data through this function. This gives you a TransferId in return which you will give to the SDK.
// ReadyRemitSDK
import ReadyRemitSDK

class ViewController: UIViewController, ReadyRemitDelegate {
    ...

    func onSubmitTransfer(transferRequest: ReadyRemit.TransferRequest,
                          success: @escaping (String) -> Void,
                          failure: @escaping (String, String) -> Void) {

        // Make an API call to your server with the TransferReqeust data
        // Expect a transferId to be returned
        let transferId = "abc"
        DispatchQueue.main.async {
            success(transferId)
        }

        ...

        // If token is unavailable
        let errorMessage = "error message from server"
        let errorCode = "error code from server"
        DispatchQueue.main.async {
            failure(errorMessage, errorCode)
        }
    }
}
Note on API EndpointsAs of May 1, 2024, Apple will require all apps submitted to the App Store to include a detailed declaration of API usage in their privacy manifest files. To comply with this requirement, developers must add an
NSPrivacyAccessedAPITypesarray to theInfo.plistfile of the app. This array should contain dictionary entries for each API, including ones for ReadyRemit, that accesses user or device data, specifying the category of the API and providing a clear, approved reason for its usage. These reasons must align with Apple's guidelines on privacy transparency. It is crucial for developers to review their code for API usage in categories such as SystemBootTime, FileTimestamp, UserDefaults, and DiskSpace, and to document their necessity and purpose.
Step 3 - Initialize your SDK
The last step is to initialize the SDK. The new entry point offers more flexibility for integrating the SDK into your application's navigation flow.
Method:
let config = RRMConfiguration(
    environment: .sandbox,
    language: .enUS,
    appearance: myColorObject,
    balanceCheck: BalanceCheck(
        alias: “Saving account”,
        last4: “1234”,
        balance: 200000,
        externalId: “1234-abcd-8765-hgfe”
    ),
    homeScreenTexts: ReadyRemitHomeScreenTexts(
        title: .internationalAndDomestic,
        subtitle: .convenienceAndFlexibility
    ),
    rsp: .VISA,
    singleMethod: .PUSH_TO_CARD,
    closeAfterInactivityTime: 240,
    onLaunch: {
        showAlert(“ReadyRemitSDK is launched”)
    },
    onDismiss: {
        showAlert(“ReadyRemitSDK is closed”)
    }
)

ReadyRemit.shared.startSDK(
    delegate: self,
    configuration: config,
    onLoad: { sdkView in
        let hostingController = UIHostingController(rootView: sdkView)
        controller.pushViewController(hostingController, animated: true)
    }
)
Parameters:
- delegate : An object conforming to ReadyRemitDelegate to handle SDK callbacks (e.g., authentication, transfer submission). This is the same delegate as used in previous versions.
- configuration : An RRMConfiguration object to customize the SDK's behavior, including:
- environment : The SDK environment ( .production , .sandbox)
- language : The preferred language for the SDK ( .enUS or .esMX ). If not provided, defaults to device locale
- appearance : Custom appearance object for the SDK
- homeScreenTexts : Custom texts for the home screen (title , subtitle )
- rsp : (Optional) The desired RSP to provide the transfer
- singleMethod : (Optional) Pass a TransferMethod to lock the SDK to use only this method during the transfer flow
- balanceCheck : (Optional) A BalanceCheck object for balance validation during the transfer flow
- closeAfterInactivityTime : (Optional) A Double value to set a timeout for SDK inactivity in seconds (should be at least 60seconds)
- onLaunch : (Optional) A closure called when the SDK launches
- onDismiss : (Optional) A closure called when the SDK is dismissed
- onLoad : A closure that provides the AnyView representing the SDK's root view. You are responsible for presenting this view within your application's navigation stack, as a sheet, or as a full-screen cover.
(Optional) Style the ReadyRemit SDK
You can style the SDK following this example
- Colors
// Create the style color scheme
let style = ReadyRemitColorScheme()

style.background = RRMDynamicColor(light: "#F3F4F6", dark: "#111111")
style.foreground = RRMDynamicColor(light: "#FFFFFF", dark: "#1F1F1F")
style.buttonText = RRMDynamicColor(light: "#FFFFFF", dark: "#FFFFFF")
style.danger = RRMDynamicColor(light: "#AA220F", dark: "#AA220F")
style.dangerLight = RRMDynamicColor(light: "#ECDFDF", dark: "#201311")
style.success = RRMDynamicColor(light: "#008761", dark: "#008761")
style.divider = RRMDynamicColor(light: "#E2E2E2", dark: "#313131")
style.inputLine = RRMDynamicColor(light: "#858585", dark: "#505050")
style.icon = RRMDynamicColor(light: "#444444", dark: "#7E7E7E")
style.primary = RRMDynamicColor(light: "#2563EB", dark: "#558CF4")
style.primaryLight = RRMDynamicColor(light: "#6B8DD6", dark: "#83ACF7")
style.text = RRMDynamicColor(light: "#0E0F0C", dark: "#E3E3E3")
style.textSecondary = RRMDynamicColor(light: "#454545", dark: "#B0B0B0")- Then you can pass it inside your configuration object
let config = RRMConfiguration(
  // ...
  appearance: ReadyRemitAppearance(colors: style)
  // ...
)
(Optional) Closing ReadyRemitSDK
If you wish to gracefully close the ReadyRemitSDK at any point in your code, you can achieve this with the following method:
func closeReadyRemitSDK() {
    ReadyRemit.shared.close()
}
(Optional) Inactivity Detector
If you prefer to automatically close the ReadyRemitSDK when your users are inactive, you can use the following snippet. Place it in your configuration object
let config = RRMConfiguration(
    // ...
    closeAfterInactivityTime: 240
    // ...
)
(For KYC users only) Enable Camera Permission
If you wish to use the ReadyRemitSDK with the KYC feature enabled, you will need to ask your users for Camera Permission, here is how you can do that.
- In XCode, open your info.plist file and add a new key for
Privacy - Camera Usage Descriptionwith a value explaining why you need to use the camera. We recommend the following text:
Verify my identity per KYC standards before I can start sending money to recipients

Updated 5 months ago