

SSO Setup
The Admin Portal manages Single Sign-On (SSO) via Auth0, which simplifies the authentication process for our clients and allows us to integrate via a variety of SSO providers.
Overview
Auth0 allows us to create enterprise connections, which enable users to log in using their company's identity provider (IdP).
Currently, we support all enterprise connection methods supported by Auth0, the two most popular ones being SAML and OIDC. Both of which are very easy to set up.
SSO is all or nothingOnce SSO is turned on for your organization, no one at your company can log in to the Admin Portal directly with a username and password. Every user must sign in through your identity provider, so make sure every person who needs access is assigned a role in your IdP before SSO is enabled.
Admin Portal URLsUse the correct URL for each environment when accessing the Admin Portal and testing SSO:
Environment URL Production https://portal.paymitto.com Sandbox https://sandbox-portal.paymitto.com
Role Mapping
There are five roles available for user mapping:
| Role | Description |
|---|---|
readyremit_admin | Admin |
readyremit_finance | Finance |
readyremit_user | Viewer |
readyremit_support | Support |
readyremit_pricing | Pricing |
Roles Overview
| Feature | Admin | Finance | Support | Viewer | Pricing |
|---|---|---|---|---|---|
| View transfers | ✅ | ✅ | ✅ | ✅ | ❌ |
| View senders | ✅ | ✅ | ✅ | ✅ | ❌ |
| Export CSV (if enabled) | ✅ | ✅ | ✅ | ❌ | ❌ |
| Create Support Tickets | ✅ | ✅ | ✅ | ❌ | ❌ |
| View Support Tickets | ✅ | ✅ | ✅ | ❌ | ❌ |
| Manage Support Tickets | ✅ | ✅ | ✅ | ❌ | ❌ |
| View Corridors | ✅ | ✅ | ❌ | ❌ | ✅ |
| View Activity Log | ✅ | ✅ | ❌ | ❌ | ❌ |
| Manage users | ✅ | ❌ | ❌ | ❌ | ❌ |
| Invite new users | ✅ | ❌ | ❌ | ❌ | ❌ |
| Change user roles | ✅ | ❌ | ❌ | ❌ | ❌ |
| Reset user MFA | ✅ | ❌ | ❌ | ❌ | ❌ |
| Deactivate users | ✅ | ❌ | ❌ | ❌ | ❌ |
Connection Setup
SAML
Information We Provide
PayMitto will provide the following details for both sandbox and production environments:
| Field | Value | Example (connection name acme-bank) |
|---|---|---|
| Identifier | urn:auth0:readyremit:<connection-name> | urn:auth0:readyremit:acme-bank |
| Reply URL | https://login.paymitto.com/login/callback?connection=<connection-name> | https://login.paymitto.com/login/callback?connection=acme-bank |
| Logout URL | https://login.paymitto.com/logout | https://login.paymitto.com/logout |
Use the exact connection name PayMitto providesReplace
<connection-name>with the exact value PayMitto gives you. Never use a name you choose yourself. The connection name in the Identifier and Reply URL must match the connection we create in Auth0, and a mismatch will cause login to fail.acme-bankabove is only an example. Your value will be different.
Information We Receive
Customers will provide:
- A login URL
- An x509 certificate
These are used to create the enterprise connection in Auth0.
OIDC
Information We Receive
Customers provide an OIDC discovery URL. We use this to create the enterprise connection and then inspect the JSON response from the URL to determine whether the requested scopes need to be updated to include the scope for the user role.
Information We Provide
Provide the customer with the following details for both sandbox and production environments:
| Field | Value |
|---|---|
| Reply URL | https://login.paymitto.com/login/callback |
| Logout URL | https://login.paymitto.com/logout |
Note: The Reply URL for OIDC does not require a
connectionquery parameter.
IT Setup Checklist
A quick summary for your IT team.
What you send to PayMitto
- SAML: your login URL and x509 certificate
- OIDC: your OIDC discovery URL
What PayMitto sends to you
- Connection name
- Identifier
- Reply URL
Where to log in to test
- Sandbox: go to https://sandbox-portal.paymitto.com and sign in with your company credentials
- Production: go to https://portal.paymitto.com and sign in with your company credentials
Creating and assigning roles in Entra
First, ensure the roles have been created in Entra -> App Registrations -> [the application] -> Manage -> App Roles:
Create each role with a name and description of your choosing, allowed member type of Users/Groups, and the values above
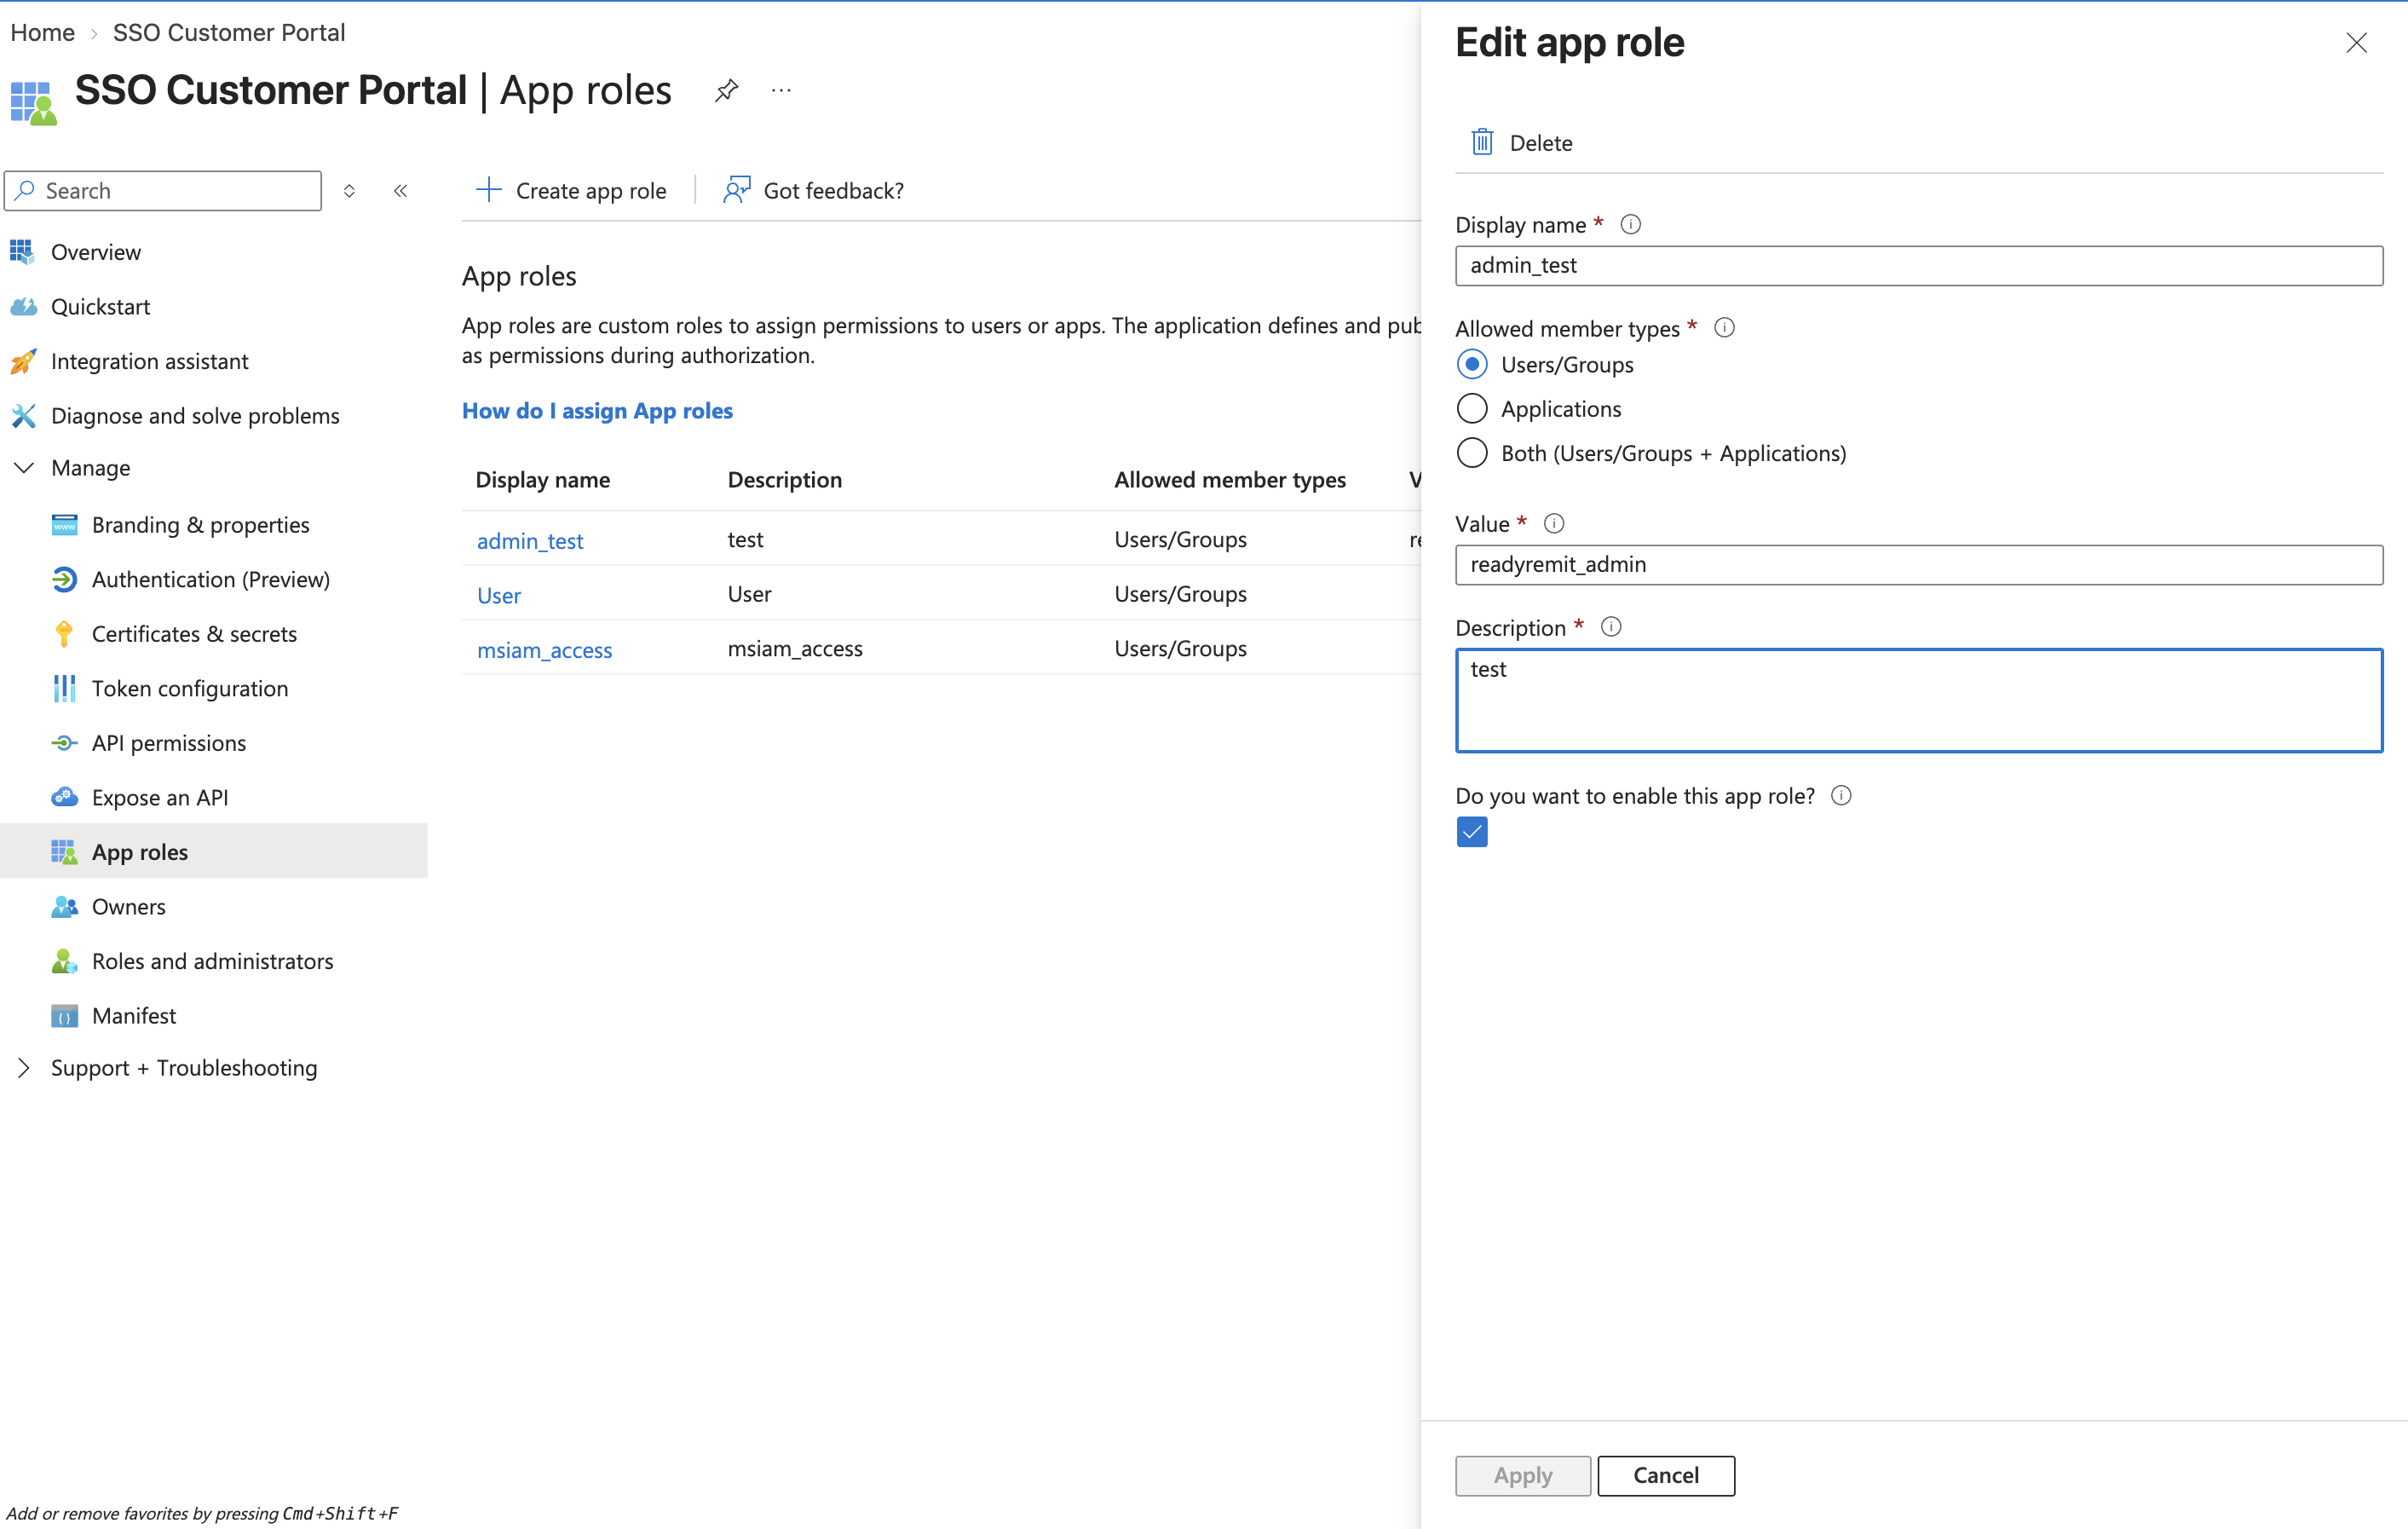
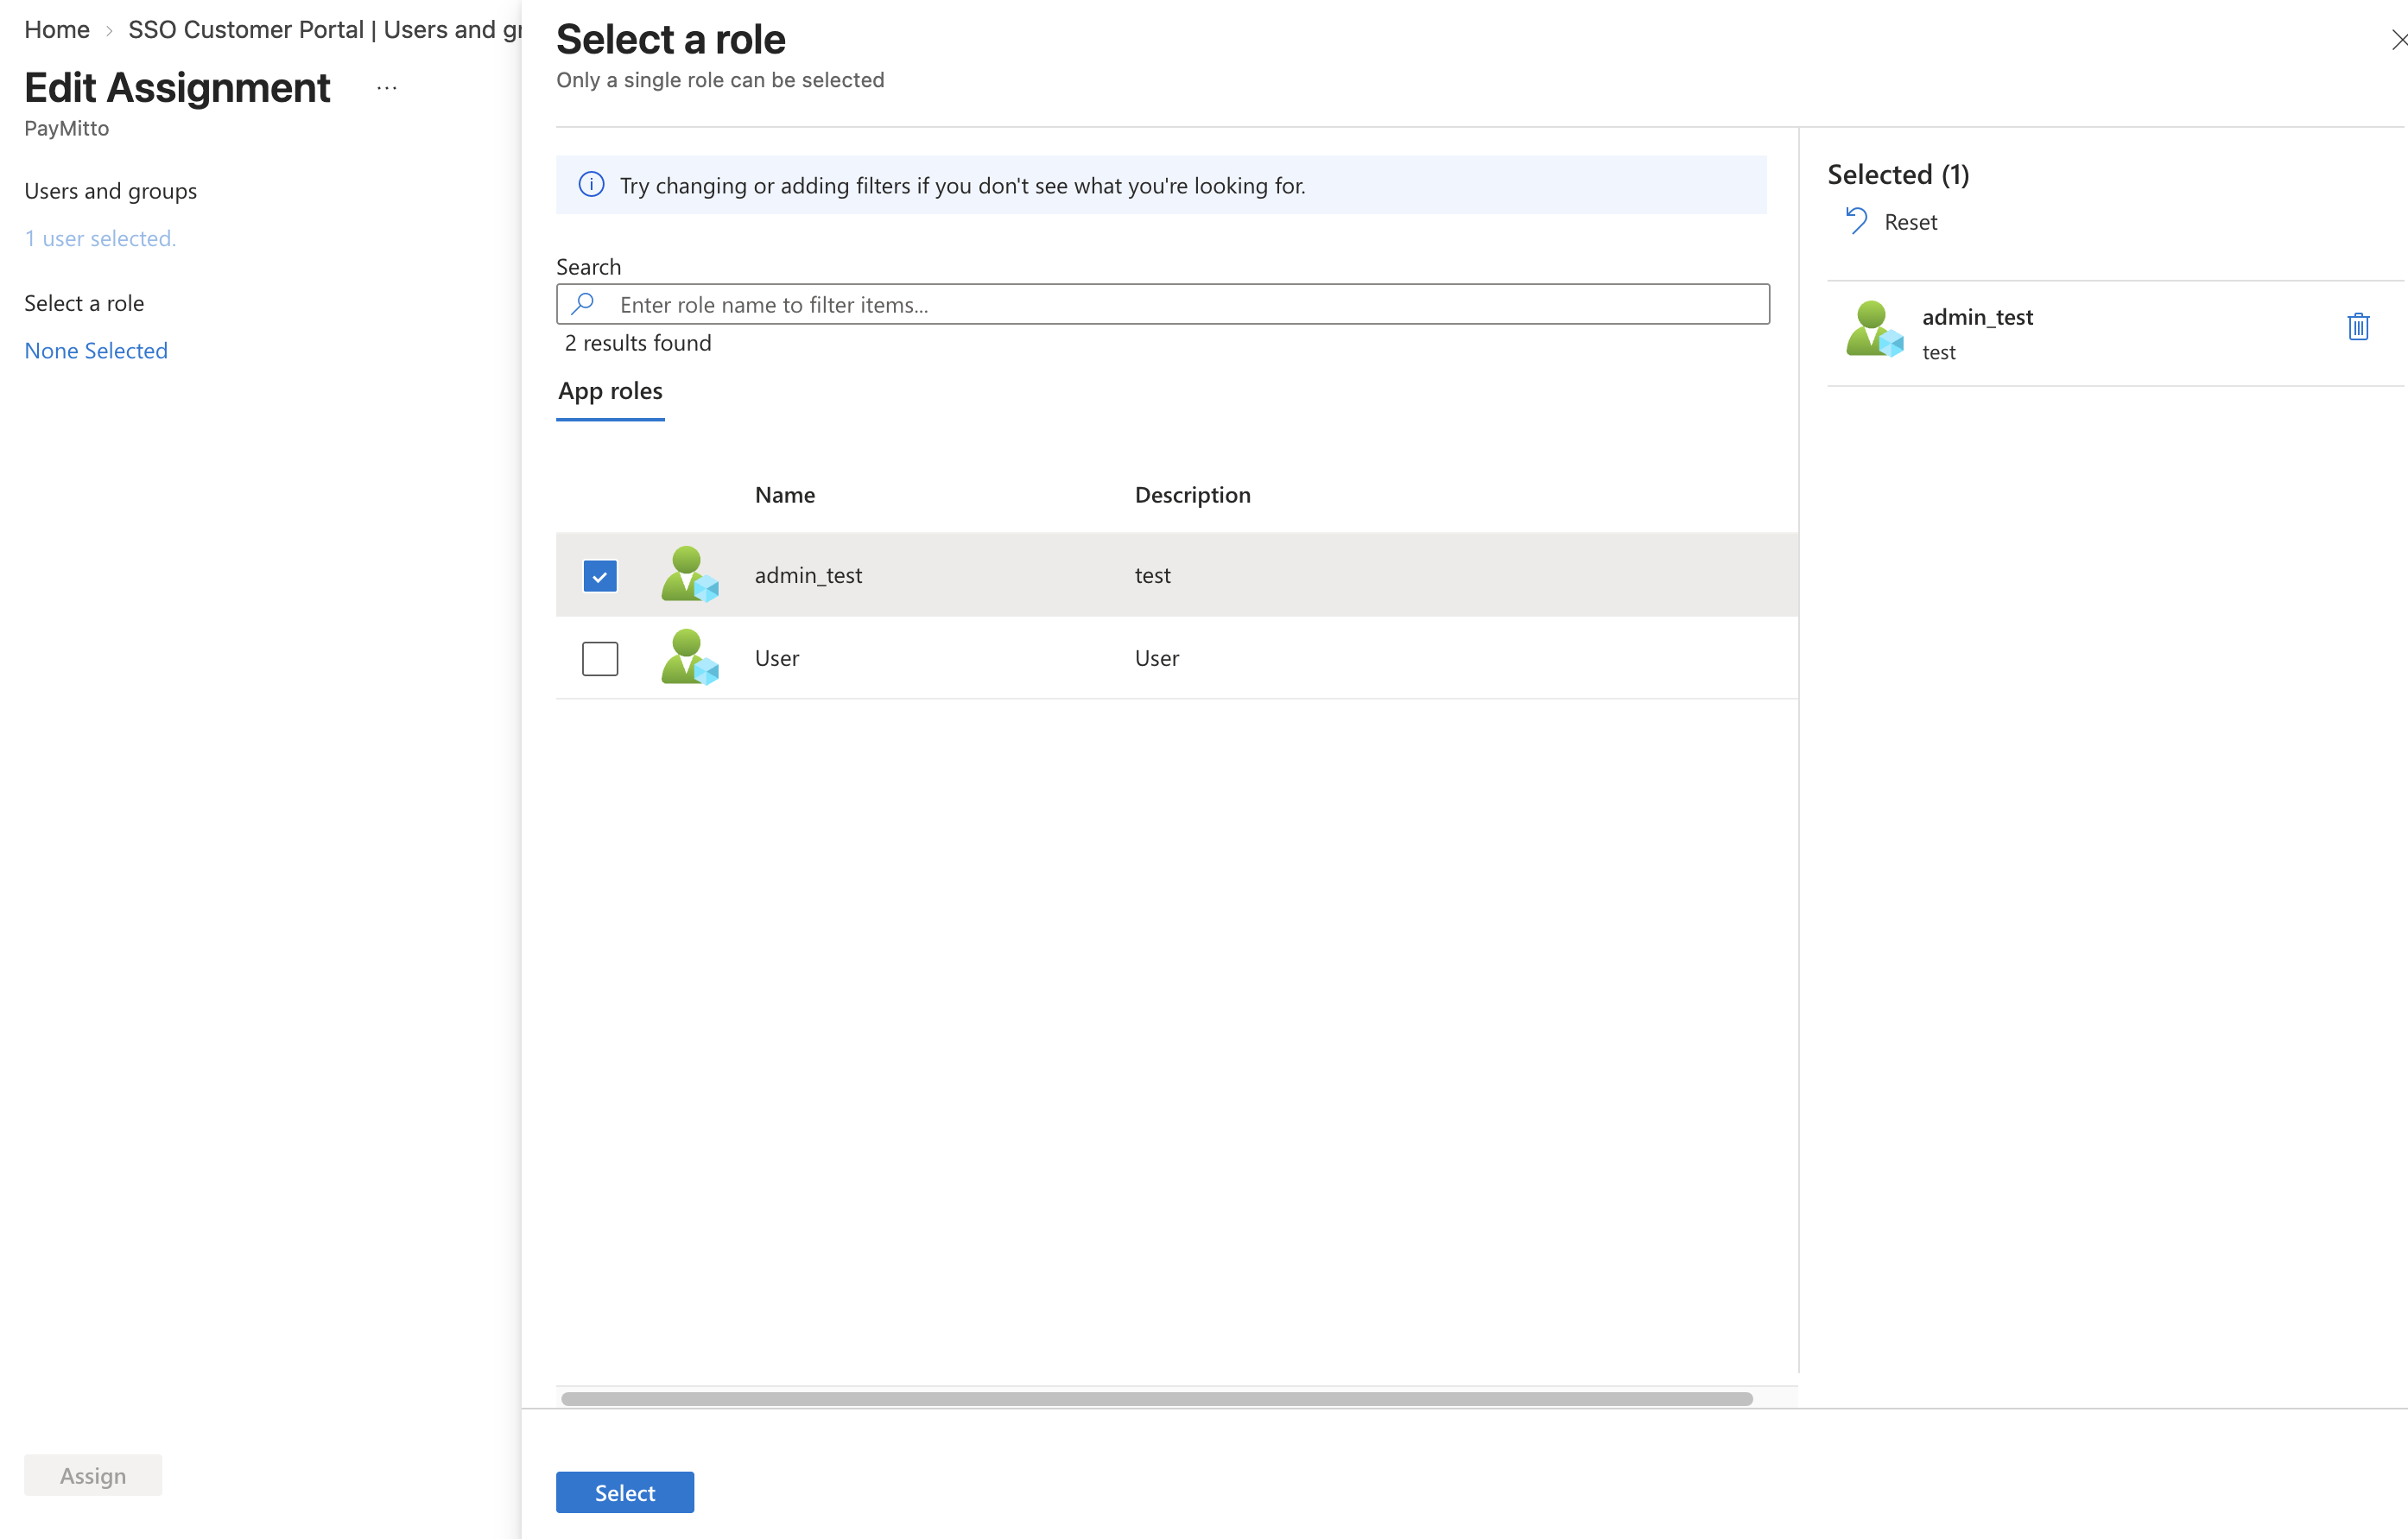
Then, go to Entra -> Enterprise Applications -> [the app] -> Manage -> Users and Groups -> Add user/group -> Select the appropriate group, and select the role you just created
Updated 10 days ago